
Development Log 8 - Colour Gradient and Fractal Perlin Noise Implementation
Implementing Colour Gradient into Mesh with Vertex Colours
This entry focused first on improving the terrains visuals. Colours applied to terrain mesh help contribute to the type of geography represented, be it snow, grass or rock.
Currently, the project can only lerp between two colour values based on the maximum and minimum heights of the mesh.
It was determined, for the project's presentation of terrain, more colours were required to be displayed on generated meshes, with height values influencing the colours at given points.
Unity’s documentation provides information regarding its Gradient class which can store colours in a ColourKey, coupled with time (the colours position along the gradient length).
The Gradient class also provides functionality to interpolate through these different colours. 1

Figure 1: GenerateColour method returns an array of colours based on the gradient passed in. Float argument is the maximum height possible on the mesh, allowing normalisation of the colour projection based on mesh height.
Brackeys (2018) provided insight on implementing gradient colour to meshes through using a shader, rather than changing colours value of a texture's pixels. 2
Following this, this projects prior method of applying colours to a texture was removed and replaced with assigning colours to mesh vertices based on the gradient values of the TerrainInformation. (See Figure 1).

Figure 2: Showcase of gradient colours on mesh.
The outcome of this provided a visual improvement in the terrain's visuals, with multiple colours, and blending of these colours, being projected to the mesh based upon the vertex height levels. (See Figure 2)
Live Update of Terrain Meshes
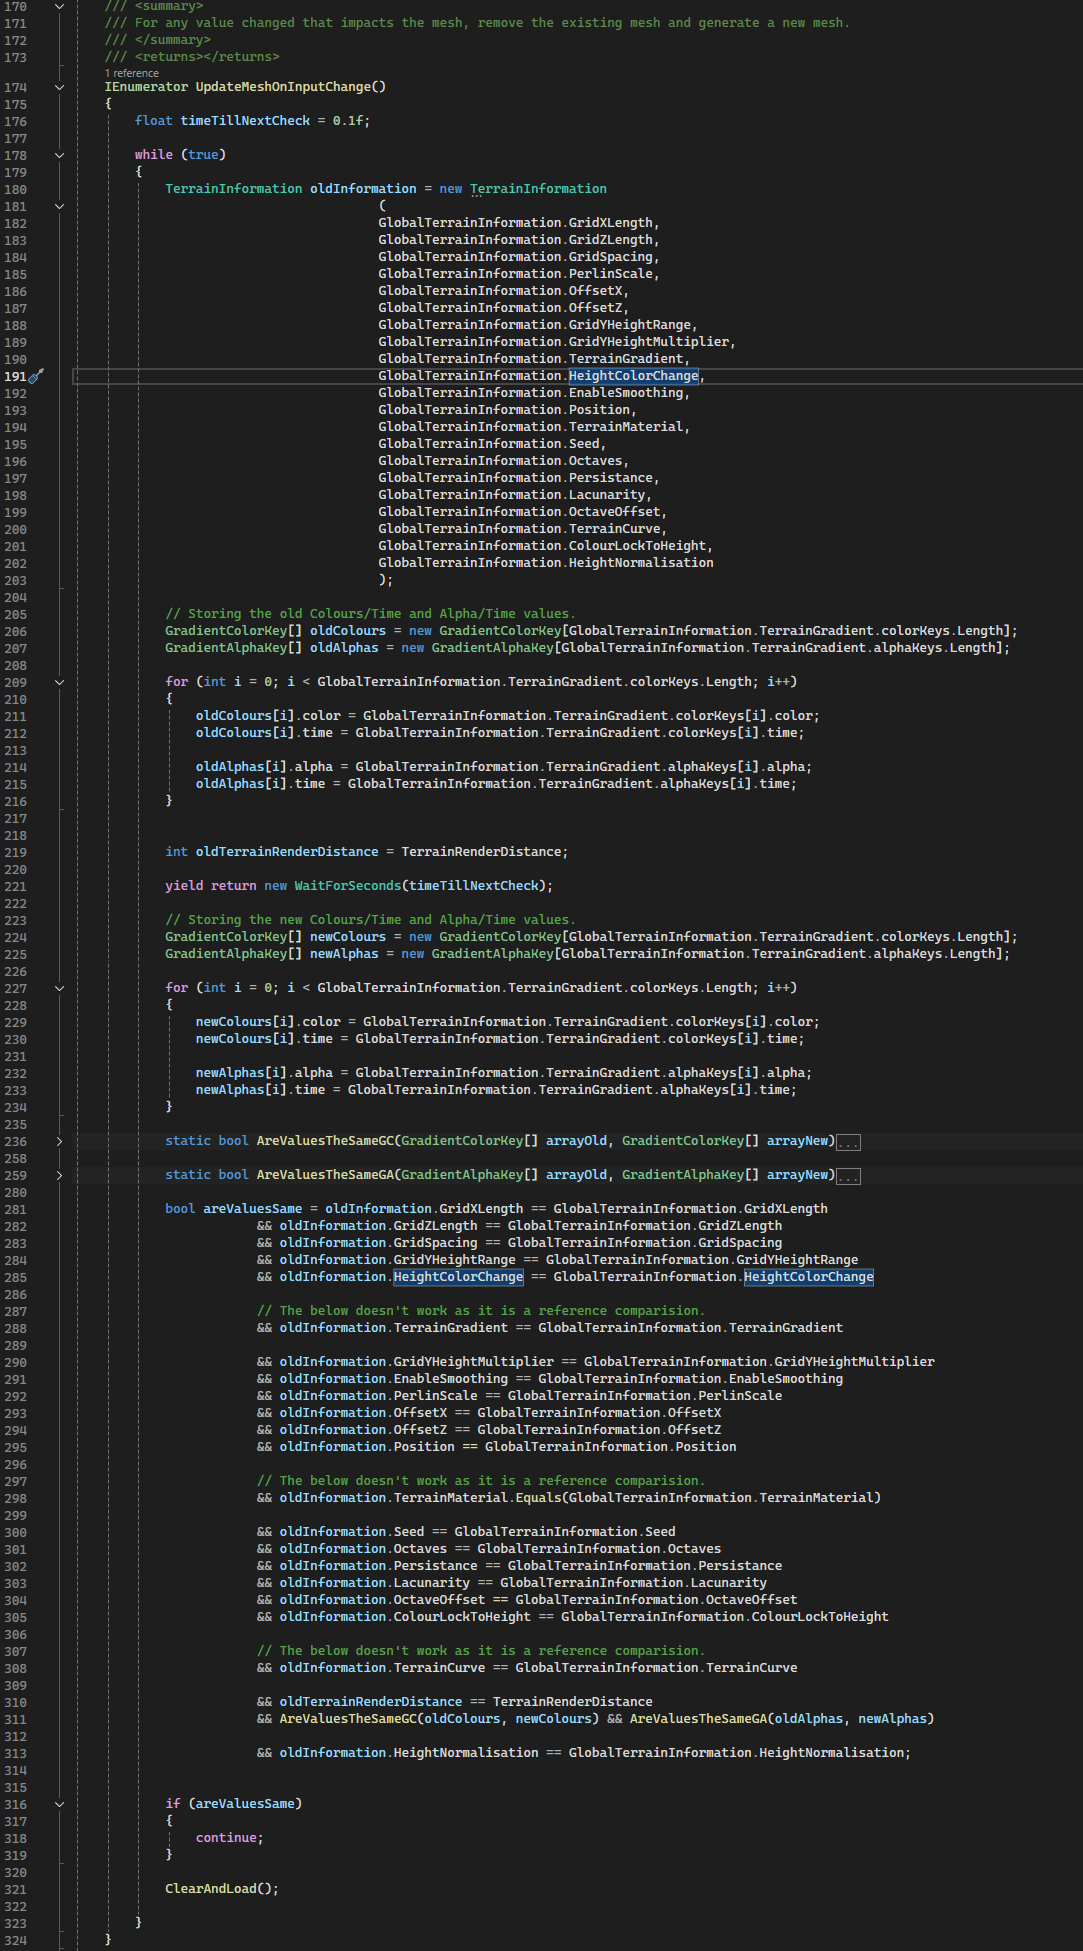
Figure 3: Coroutine runs upon Start of TerrainManager script – creates a copy of the TerrainInformation variable and stores it for a timeframe. Then compares this “old” copy’s values with the current TerrainInformation value – any changes of compared values result in a deletion of old meshes, and new set of Meshes generated.
TerrainManager now live updates all the terrains it when it’s TerrainInformation values are changed. This was completed through implementing a Coroutine that compares a prior stored copy of TerrainInformation to the current TerrainInformation values. (See Figure 3).

Figure 4: Static List of GameObject containing generated Terrain Meshes.
A development issued encountered was the duplication of terrain meshes; old meshes that should have been deleted remained. This was solved through changing TerrainManagers List of GameObjects containing generated meshes to a static variable as highlighted by Lague, S. (2016) in his videos on Terrain Generation. 3 (See Figure 4).
The live updating of terrain allows makes not just experimenting with terrain values quicker, speeding up development, but allows for planning for user interaction with the project, as changes to Terrain Information made by the user can be reflected in the terrain.
Fractal Perlin Noise – Layering Octaves
Within development Log 5, Perlin Noise was discussed and implemented as a single layer. The challenge for this entry was to develop an implementation of Fractal Perlin Noise; multiple layers of Perlin Noise (Octaves) with each layer having a diminishing amplitude and increasing frequency to allow finer details to emerge in the mesh height value.
The goal of implementing this is to produce visually realistic terrain and increasing the variations of terrain that can be procedural generated – is the values affecting each layer are modified it can produce varying levels of detail procedurally.
The Implementation of Octaves into Perlin Noise generation was inspired by Lague (2016) in his video Procedural Landmass Generation (E03: Octaves). 4
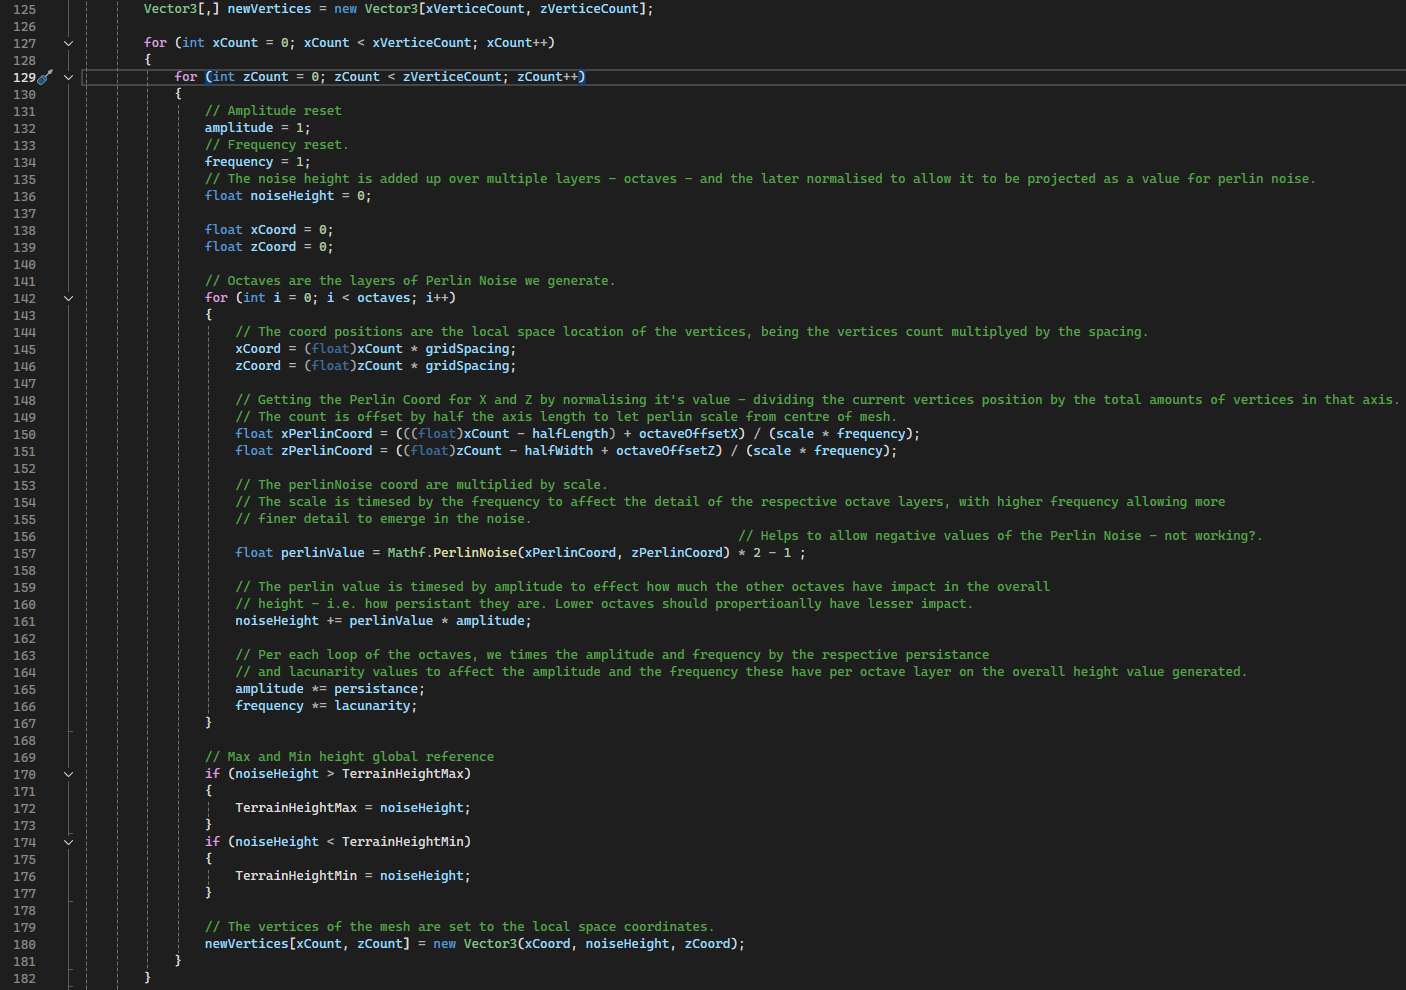
Figure 4: Code snippet demonstrating looping through Octave layers and calculating total height value for each layer.
As shown in Figure 4, each vertex in the mesh is processed through a loop for every Octave layer, with the resulting height values summed to determine the final height for that vertex.
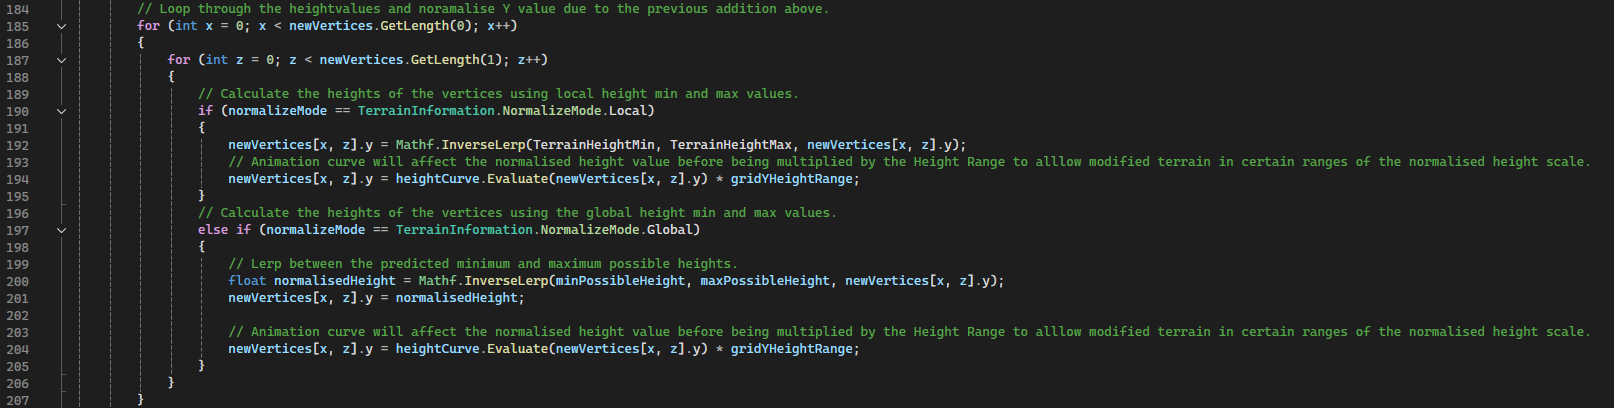
Figure 5: Normalisation of the final height value before multiplication by the desired height limit - also demonstrates evaluation via animation curve and lerping for normalised height values on the vertices.
These total heights for each octave layer on that vertex, the height is then normalised as per Figure 5 between the minimal height the of the terrain and the maximum height of the terrain. These minimum heights and maximum heights are calculated during the looping of the vertices.
Each Octave layer’s height value is adjusted using persistence and lacunarity factors:
Persistence modifies the amplitude, progressively reducing the impact of subsequent Octave layers on the overall height value.
Lacunarity increases the frequency, enabling finer variations between neighbouring vertex heights.
Figure 6: Video demonstration of modifying the Octave Layers amplitude and frequency via their Persistence and Lacunarity factors respectively.
The outcome above demonstrates the visual improvements that implementing Octave Layers has provided towards project, enabling further parameters which produce greater variability in the terrain produced by the meshes.
Figure 7: Example of animation curve effects on height values.
To further increase the variability in the terrain, an animation curve was added. The generated Y values of the mesh, before being applied, are evaluated against the animation curve to flatten or heighten the terrain at any given point, allowing greater customization of the terrain types being produced.
Refer to Figure 7 for the outcome, with Figure 5 showing the line at which the animation curve evaluation takes place programmatically.
Resolving Seam Issues
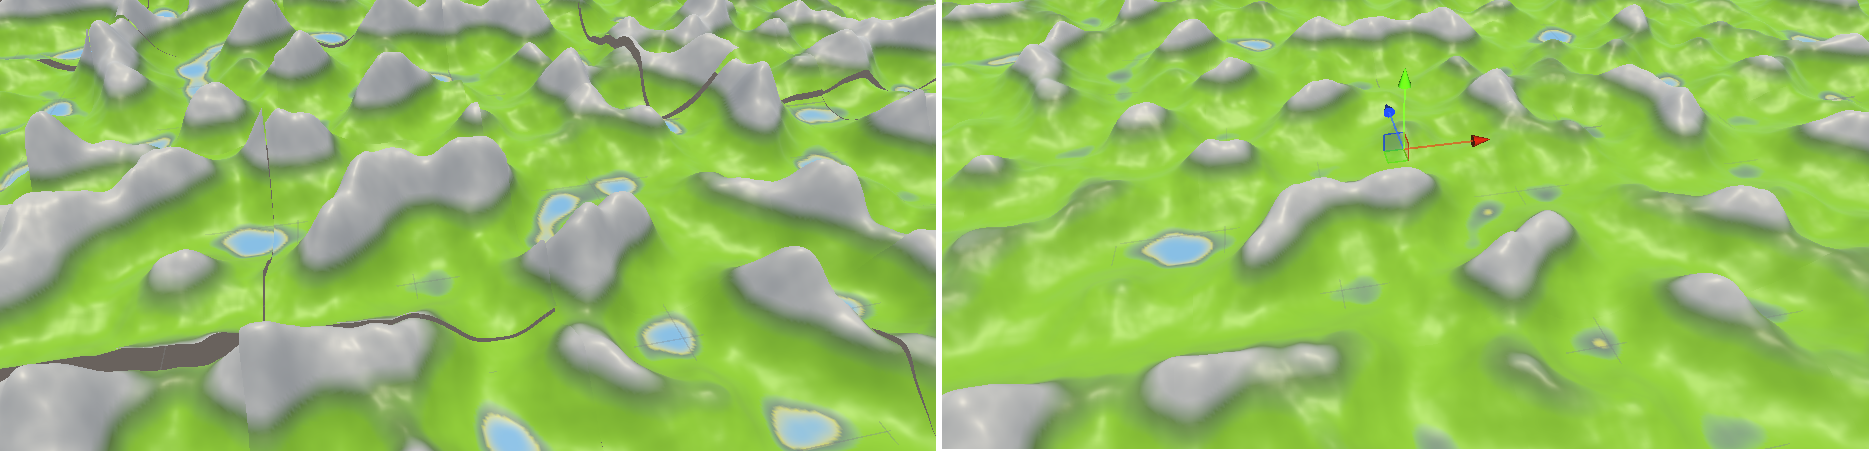
Figure 8: Example of seams before fix and post-fix.
An issue encountered throughout development was the seam of neighbouring meshes did not align. The issue was partly due to the incorrect calculation of the Pelin Offsets.

Figure 9A: First snippet of fix for seaming issue.
Currently, the heights of the mesh per chunk are generated via lerping between the maximum and minimum heights attained on a per chunk basis – each Mesh TerrainObject would have slightly differing heights resulting in the seams at the edges.
However, S. Lauge demonstrates that the total possible height of the mesh over all the chunks can be estimated, on a per chunk basis, by adding up the total possible maximum amplitudes allowed across all Octaves layers. 5

Figure 9B: Second snippet of fix for seaming issue.
This projects implementation calculated both the minimum and maximum possible heights and lerp between these to find normalised values that were then multiplied by the desired heights scale.
Refer again to Figure 5 for the normalisation. Figure 9B shows the maximum possible heights are calculated based on Octave layers and the calculated amplitudes, before the vertices are even looped through.
References
Unity (n.d.) Gradient. Unity Documentation. Available at: https://docs.unity3d.com/6000.0/Documentation/ScriptReference/Gradient.html (Accessed: 7 December 2024)
Brackeys (2018) MESH COLOR in Unity - Terrain Generation [YouTube video]. Available at: https://www.youtube.com/watch?v=lNyZ9K71Vhc&app=desktop (Accessed: 7 December 2024).
Lague, S. (2016) Procedural Landmass Generation (E10: seams) [YouTube video]. Available at: https://youtu.be/4olmeStiBsE?si=s1-Ymq9Qc6X-7Lm8 (Accessed: 7 December 2024)
Lague, S. (2016) Procedural Landmass Generation (E03: Octaves) [YouTube video]. Available at: https://www.youtube.com/watch?v=MRNFcywkUSA&list=PLFt_AvWsXl0eBW2EiBtl_sxmDtSgZBxB3&index=3 (Accessed: 7 December 2024)
Lague, S. (2016) Procedural Landmass Generation (E10: seams) [YouTube video]. Available at: https://youtu.be/4olmeStiBsE?si=s1-Ymq9Qc6X-7Lm8 (Accessed: 7 December 2024)